Tuesday, 24 October 2017

Cattle Raid - A New Scenario for Congo

Cattle Raid

Adventure Rules
  • Savannah, cattle, confusion, exhaustion, night, enter on the table, exiting the table


Terrain
2 + d3 Village Huts 
Cattle Pen
3 + d3 high dangerous terrain (d8 cover)
6 + d6 blocking terrain

The Herdsmen player places all terrain at the beginning of Turn 1 (after both columns draw a Totem Card but before Activation Cards are chosen). A cattle pen containing 4 cows must be placed within M of the centre of the table. The pen is formed from sections of thorn bush boma. Huts are then placed within L of the centre of the table and must be more than S away from each other.  

Area terrain must not be placed within M of another area terrain. Blocking terrain must not be placed within S of another terrain (hut, cattle pen, area terrain or blocking terrain).

After the Herdsmen player has set up the terrain, the Cattle Rustlers may discard a Totem Card to move/remove any one item of terrain (excluding cattle pen). Terrain moved/removed in this way must follow same rules as above for minimum number and placement.


Protagonists
Herdsmen (defender; African Kingdom Column). Must include at least one group of scouts.
Cattle Rustlers (attacker; African Kingdom Column) - start with initiative.

The Cattle Rustlers decide how many points between 35 and 50 they wish to include in their column. The Herdsmen Column will be double this size. 

For example, if the Cattle Rustlers choose 35 pts, the Herdsmen are permitted 70 pts.  


Deployment
The Herdsmen deploy first. See special rules for deployment of sentries. 
Each remaining group of Herdsmen are either deployed in a hut or are present off table. The Herdsmen player secretly chooses which groups are deployed in each hut (the defender may choose to leave any/all of the huts empty). Only one group may be deployed in each hut. Off table groups enter on the table from a random corner (roll a d4 and consult terrain map when each off table group is first activated to move in from). 

Off table groups arrive from nearby villages and must test for exhaustion when they enter play. 

After the Herdsmen have deployed, the Cattle Rustlers secretly choose a short table edge that represents the best escape route back to their own village. They may only exit the table along this table edge (A or B). The Cattle Rustlers may then be deployed anywhere on the table that is more than L away from the cattle pen. 


Special Rules

Sentries
Defender may deploy 1 - 3 sentries. These are taken from a single group of scouts and are placed anywhere on the table (outside of the cattle pen) before the Cattle Rustlers deploy. Once deployed, each sentry counts as a separate group of scouts and must remain at their post. 

Remember that columns can still play influence actions, even if groups cannot yet be activated to move or shoot...

During the day, sentries can see enemy groups in line of sight at any distance. 

At night, sentries may detect enemy movement even when there is no direct line of sight (they are listening very hard!). Each time an enemy group ends its movement within L of a sentry, roll a d6 for each enemy figure. On three successes, the enemy is detected. When an enemy group ends its movement within M of a sentry only two successes are needed. Within S of a sentry, the enemy group is detected with a single success. 

Sentries always hear any rifle or musket shooting regardless of distance. It goes without saying that sentries who survive a melee attack automatically detect their assailants! 

If a sentry detects an enemy group that sentry may be activated as normal.  All other sentries remain at their post until they either detect a group (friend or foe!) or the alarm is raised. They may then be activated as normal. 

At night, all groups (including sentries) roll d8 for cover. 

Each time a sentry is eliminated before the alarm is raised, the Cattle Rustlers player may draw a Totem card. 

Cattle Pen
The Cattle Rustlers must release the cattle by moving into contact with the pen and then breaking through. The pen can either be carefully dismantled by discarding two totem cards or broken into by rolling two unopposed successes during melee. In either case, the thorn hedge surrounding the pen is removed from the board. 

Cattle
Once the pen has been breached, the Cattle Rustlers may capture cattle as per the rules on pg. 71. The Cattle Rustlers must first initiate a melee and declare how many cows they want to steal. The Herdsmen roll 3d6 per cow. 

Unattended cattle will exit the pen following their normal movement rules and will attempt to remain in base to base contact with each other. The frightened cattle consider groups from both columns that are in line of sight as enemies for the purpose of determining movement direction. Any fleeing cattle that exit the board are lost to lions.

Huts
Huts may be plundered as per the rules on pg. 72. 

If a plundered hut contains a hidden group of Herdsmen, a melee is automatically initiated (instead of rolling on the plunder table). If the hut is plundered before the alarm is raised, the attackers roll melee dice as normal, but the sleepy defenders immediately draw a stress token and roll only half their normal dice (rounded up). Once the alarm has been raised, the tables are turned and the defenders roll melee dice as normal, but the surprised attacking group immediately draws a stress token and rolls only half their normal dice (rounded up). 

Once activated for movement, a group in a hut is moved by placing a measuring stick next to the hut (any face). 

Groups may neither shoot from a hut or be shot at whilst occupying a hut. 

Groups inside huts count as off table with regards to rules such as picking up the pace, night etc. That is, groups within a hut are ignored. 


Alarm
The alarm is raised when: 
  • a sentry moves into contact with a hut concealing a hidden group
  • a group of Cattle Rustlers fires a rifle or musket (defender must roll at least one success with 1d8 per shooting figure)
  • a group of Cattle Rustlers attempts to plunder a hut and disturbs somebody (ie rolls 1 on the plunder table)
  • a group of Cattle Rustlers attempts to plunder a hut and finds it occupied by a defending group (alarm raised at end of melee if at least one defender survives). 
  • a group of Cattle Rustlers attempts to break into the pen (alarm raised at end of melee, regardless of result - startled cows are noisy!)
  • the first time the cows move out of their pen (either with a group or on their own - lots of mooing!)

Once the alarm is raised, the Herdsmen receive 1 totem card for each surviving sentry. The current turn then immediately ends. 

A new turn begins with both columns subject to confusion for one turn. 

During each subsequent turn, both columns are activated as normal. 


Help from Afar
At the end of activation phases 1 & 2 during turn 7, the player with the initiative rolls a d6. On a success, the player chooses whether the game immediately ends as armed men from nearby villages suddenly jump out of the elephant grass. If the player chooses to continue the game, his opponent may draw a Totem Card. On a failure, the player passes the initiative to his opponent and the game continues. 


Victory Points

Herdsmen
Each enemy group eliminated 3 vp
Each cow in possession of Herdsmen 5 vp


Cattle Rustlers
Each cow in possession of rustlers and removed from board 10 vp
Each other cow in possession of rustlers 5 vp
Plunder taken from huts in possession of Cattle Rustlers 3 vp

Turns
1 (night)
2 (night)
3 (night)
4
5
6
7 (help from afar)


We had a lot of fun play testing this scenario - it may even encourage me to finish painting my African Cattle!  Let me know if you decide to give it a go. 


SELWG 2017

Another year, another trip to Crystal Palace for SELWG!


This year Friday Night Fire Fight Club put on a participation game based on a simplified version of Deadzone that borrowed some ideas from our last Bolt Action game set in Stalingrad! This time the plucky participants had to try and get to the jump ship whist avoiding being eaten by radioactive zombies (controlled by members of the club).


The board was split into two levels and participants could find themselves in either. Luckily, those unfortunate to start in the tunnels could find an express elevator that would zip them to the surface (and onto the second board). Unfortunately, most participants also found that they were zipped straight into the clutches of a waiting zombie! Sadly, at least one participant managed to beat the club and get two soldiers to safety on the dropship. Of course, it was a pity about the pilot....

I spent the morning rushing around to try and get all of the items on my list. It was a long list, a very, very long list and I only managed to get a fraction of what I was after. Still it was a decent haul...


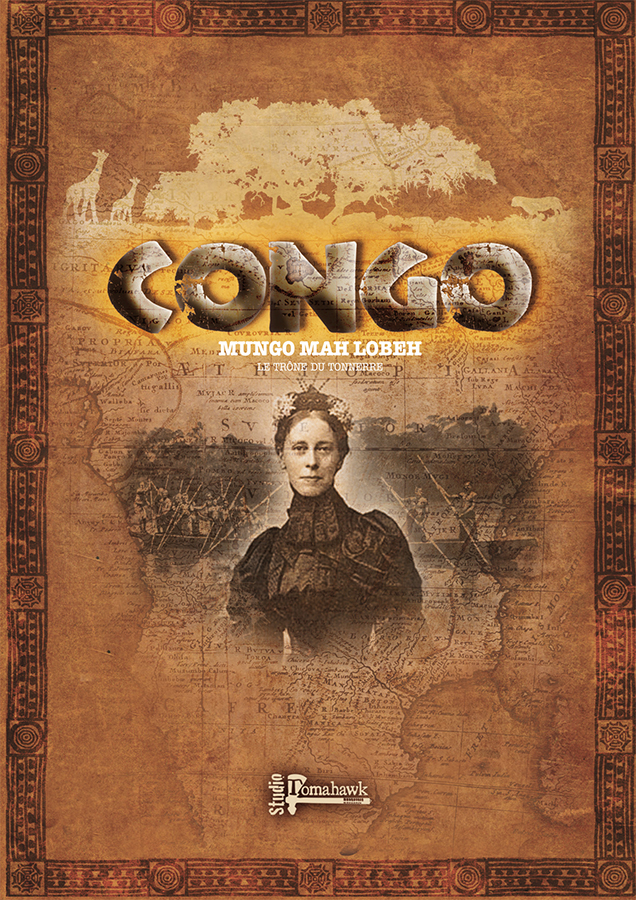
Was pleased to pick up the new Congo campaign supplement. Already read through this and may write a short review if there's interest.

Quite a few demonstration and participation games. I spent a good part of the afternoon helping with the club game so didn't get chance to try anything else. I did grab some photos though.


See you at Cavalier in 2018!

If all goes well, we'll have something special to show...


Tuesday, 17 October 2017

Congo Campaign News and Terrain

If you are a fan of Studio Tomahawks game Congo, based in Darkest Africa you'll no doubt know that a new campaign supplement is in the works.


There's now also a Wargames Illustrated video flip through available on YouTube. 

Here's a quick summary of what we know so far:

The campaign details the exploits of Mary Kingsley as she attempts to learn more about the customs of local peoples and eventually climbs Mount Cameroon by a previously unattempted route. Mary Kingsley was a rather famous Victorian lady who championed local customs and religious beliefs and even went so far as criticising the church for sending missionaries to convert people to christianity.   

Mary's White Men Expedition is opposed by a Forest Tribes column led by (I think) a witchdoctor called Ujuwa. Both characters are depicted by new figures that come with the book. 

Six new linked adventures are included in the soft back campaign book. Its tricky to tell from the video, but it looks like each of the columns has to progress along a predetermined route that is marked out on a campaign map (one for each column). Characters can discover new facts/talents as they progress and these provide bonuses. 

Four new animal encounters are included. The Savannah lion is joined by hyenas and elephant while the jungle gorilla is joined by hippopotamus and leopard. So now, when an animal stress token is drawn a d6 is rolled to determine which animal appears. 

Sadly, it looks like there are no new 'environments', although there are new dangerous terrain tables for Savannah and Jungle. Not really sure why these are needed? 

The campaign looks like it will be fun and is something that I think will make the Congo ruleset really shine. 

My own Congo columns and scenery are coming along. I also play Death in the Dark Continent and Men Who Would be Kings. My African Kingdoms column has therefore been expanded and I now have fully playable Azande forces for all three games. Since most of the scenarios that I have played in DitDC and mwwbk are either grassland, steppe or savannah based, this has been the focus of my terrain building. 

My savannah terrain is therefore well advanced and I have more than enough to play savannah based Congo adventures. 


Of course, you can never have enough and I'll no doubt be adding more to this! 

I now need to create some suitable jungle terrain. Lots of work in progress on this front that needs a whole new post. But in the meantime here's a few teasers...

First up, some blocking terrain. 


Next, work in progress on area terrain... Including a cave, ruins, river and what will eventually be a large rainforest tree. 


Lot's more work still to do! 


Saturday, 10 June 2017

Battle on Senlac Hill

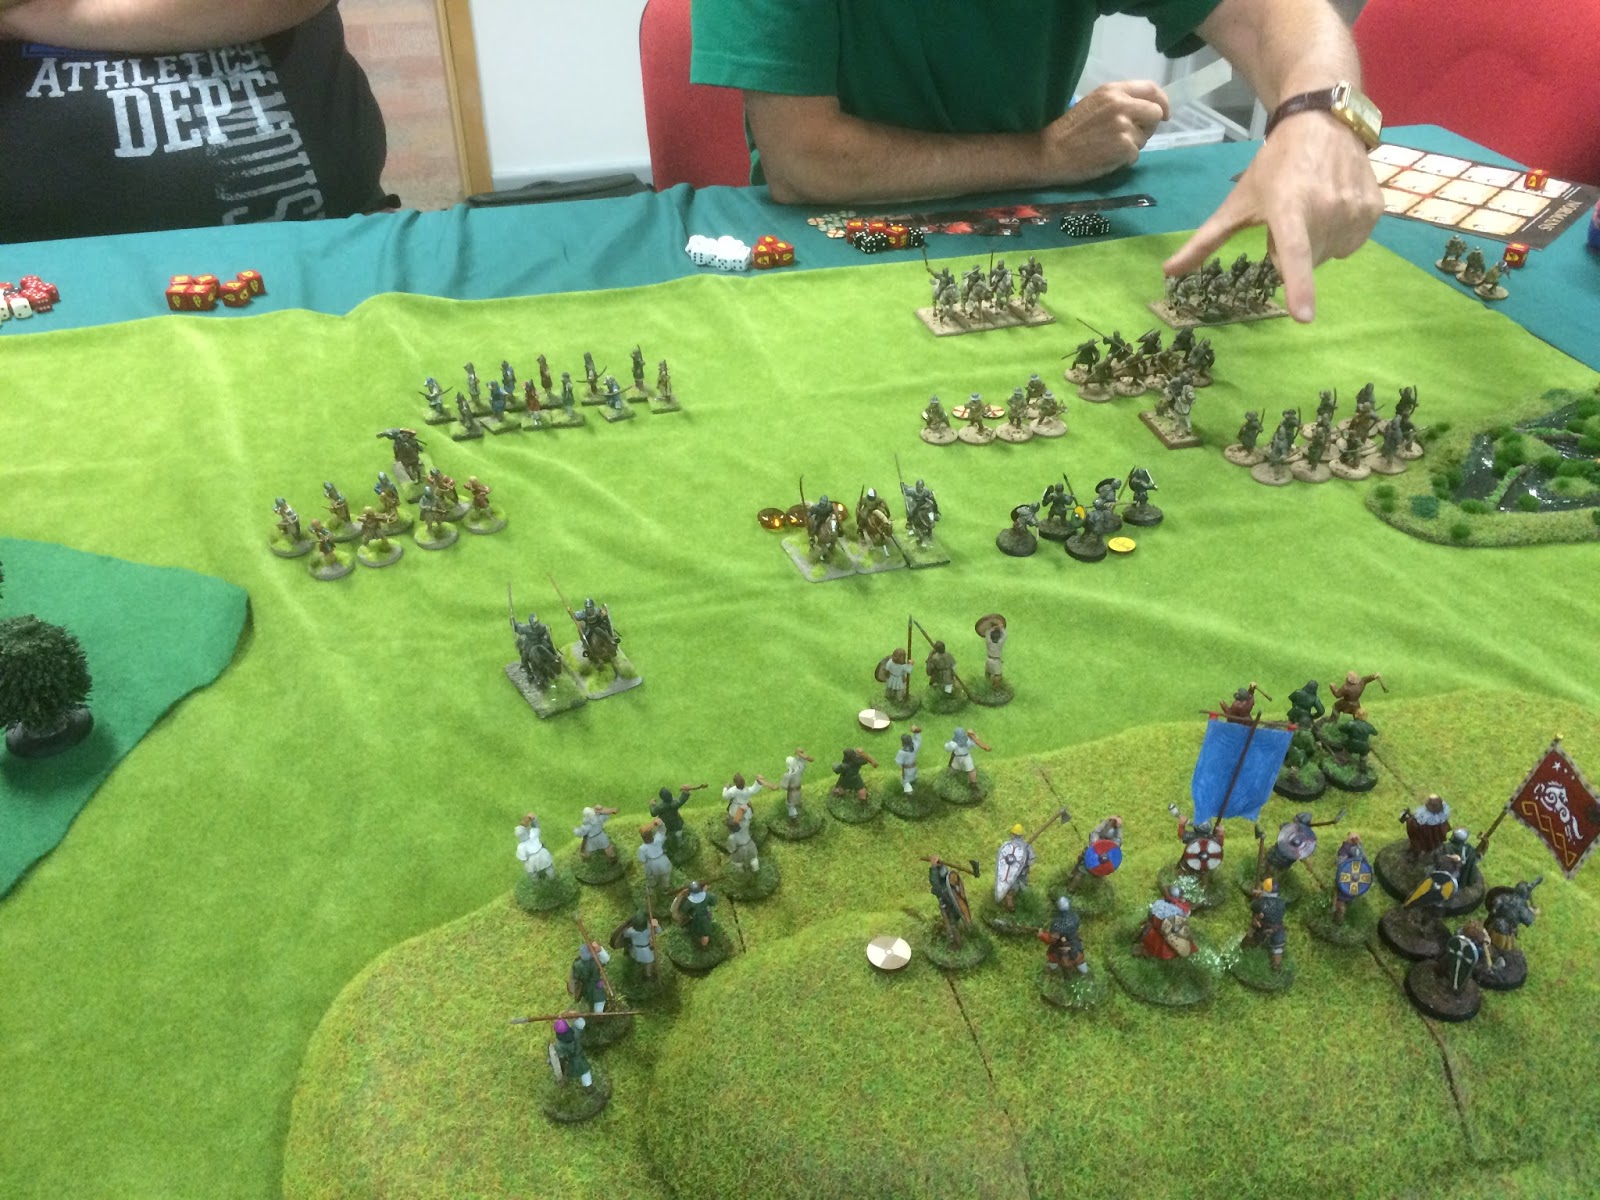
Wiping sweat from his eyes, Harold emerged from the trees and stood on top of a steep ridge. The march from York had been made in haste and his men were weary. Few had yet rallied to his banner. Would others arrive before nightfall? With Gyrth and Leofwine at his side, Harold knew that the throne of England was at stake and there could be no retreat.

Time for the conclusion to our 1066 campaign as we fight The Battle of Hastings!

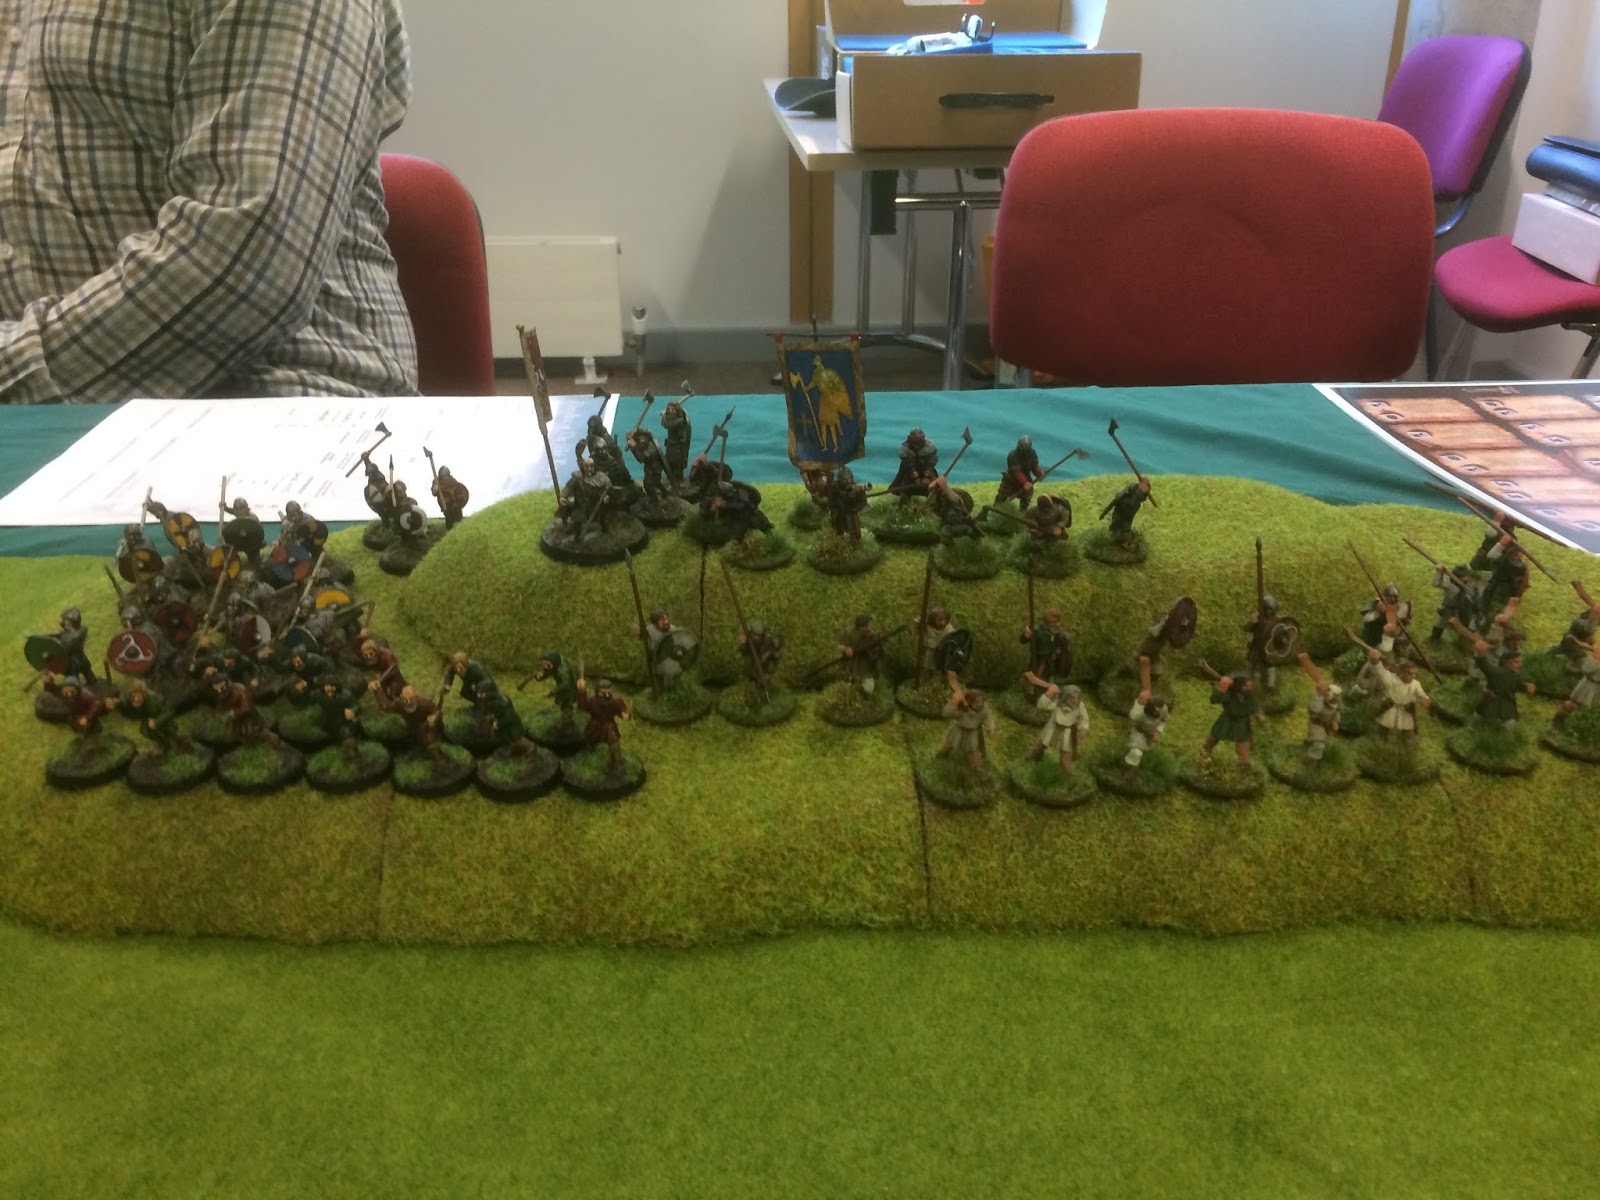
[Following feedback from pyruse on the Studio Tomahawk forum we decided to make a small amendment to the scenario rules for Senlac Hill. The hill functions as a steep elevation but reduces movement of mounted troops from L to M (rather than L to S). ]

Harold's forces were somewhat depleted and fatigued after Stamford Bridge and the long march south. But they stood determined and defiant.


Below them stood William and his Herald, Ivo Taillefer, together with a host of Norman cavalry, archers and crossbowmen.


Harold's left flank was protected by woodland, whilst a rank area of marshland was located to the right.


The Normans started their advance, but found the ground rough going with several units feeling as though they had become trapped in a mire.

Ivo's cavalry made haste and picked their way through the woodland. Although fatigued, they had manoeuvred into a good position for a flank charge.


Another mounted unit galloped ahead to scout out the hill.


Meanwhile, William signalled a general advance.


Missiles rained down upon Harold and his men, but casualties were light and the shieldwall held firm.

Ivo suddenly burst into song and his troops were revitalised. Sensing that a victory could be achieved with a frontal assault his cavalry surged forwards and positioned themselves directly in front of the hill. Harold's slingers reached into their pouches...


The Norman cavalry found themselves battered by stones. Where was their support?!


Norman crossbows quickly followed up, but Harold's men sensed that the Norman line was floundering.


"Hold the line you fools!" cried Gyrth.

But it was too late. Warriors charged down the hill towards the startled Normans!


William look on in amazement as the warriors crashed into the Norman cavalry like great Lords of Battle. But, whilst fatigued by the endeavour, the mounted hearthguard held their ground and inflicted heavy casualties on their assailants.


More English warriors started to stream down the hill. William's crossbows desperately tried to reload, but were beaten back.


The English warriors started to tire and suddenly they found themselves alone and isolated. Seeing the threat, the Norman knights regrouped and hacked the warriors down.


The English assault had been defeated, but not without some loss to the Normans. William took stock of his forces.


Harold and his huscarls stood defiant. The shieldwall may have thinned as the day progressed, but it remained a formidable barrier.

"But what of the fyrd?" asked Gyrth "Will they abandon us in our time of need?"

"Have faith brother", replied Leofwine "they will be here!"


William looked up at the afternoon sun and a shadow passed over him. Was there still time left to secure the crown?


Joining his knights, William positioned himself on Harold's flank and charged a unit of warriors who were trying to scramble back up the hill to safety.


William's knights trampled down the warriors. But as the frenzy subsided, William looked about him and realised that his knights also lay slain. By now it was late afternoon. With his knights dead, William cried out in despair. The crown of England was slipping from his grasp...


Harold gazed at the Normans below him. Some of the Norman cavalry were starting to retreat! Nightfall and the protection afforded by its darkness would soon be upon them.

"Shh! What is that?'

Gyrth turned to his brother in puzzlement. Harold cocked his head to listed. Above the din of battle a lone voice could be heard.

"Is that a song?"


Suddenly Ivo Taillefer rode from the lengthening shadows and charged up the hill. His song drove the English warriors before him. What remained of the levy slingers fled in panic and Ivo fell upon Harold and his brothers. Shielding Harold from the Norman, both Gyrth and Leofwine fell. Ivo raised his sword and brought it down upon Harold.


As he staggered backwards, Harold watched as one of his loyal huscarls threw himself in front of the bloodied sword. Ivo turned and hacked at the household guard.


Night was nearly upon them, but Harold stood alone. Before him stood Ivo, his expression and voice that of a madman.


As the weak October sun sank beneath the trees, William could be heard screaming "Shoot!". A volley of arrows rained down upon Harold.

But Harold lifted his shield above his head and stood firm!

"Protect the King!"

A loud cry was heard from the woods behind Harold's line and suddenly a great host of men appeared.

Squinting in the fading light, Ivo looked on in awe and his voice fell silent.

Night had fallen and the fyrd had finally arrived!


****************************************


What a finale! We all thought Harold was safe and secure upon his hill, but Ivo's late charge nearly won the crown for William. We played for eight turns. If the Normans had one more turn, then it is likely that Harold would not have survived. As it was, Harold survived until the end of turn 8 and so secured a minor victory. A great game and huge thanks to Anthony, Carl, David and Rob!